


iSecure ICL-DC-4CH-Relay
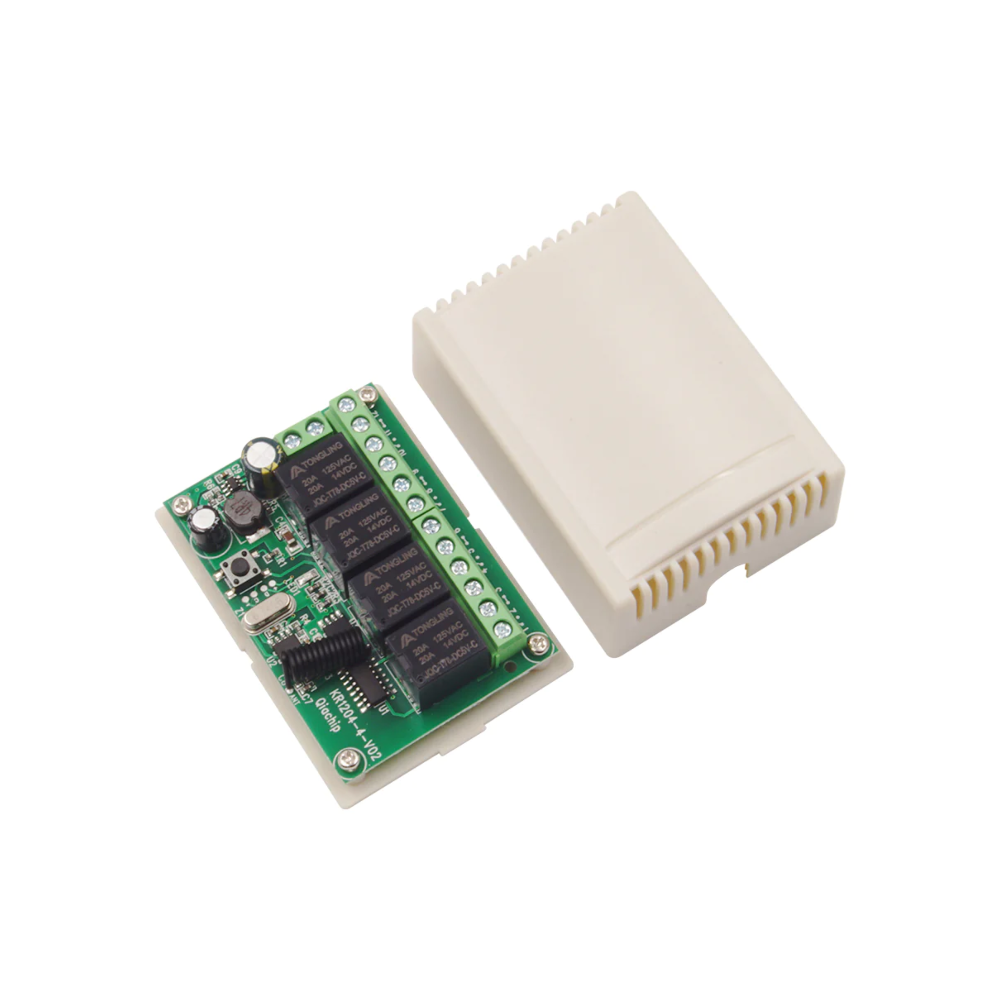
iSecure ICL-DC-4CH-Relay 433MHz Wireless Relay Receiver in a Plastic Enclosure – 4-Channel Relay Control – Used for Gate Automation & Garage Control – 6~30VDC Powered
iSecure ICL-DC-4CH-Relay 433MHz Wireless Relay Receiver in a Plastic Enclosure – 4-Channel Relay Control – Used for Gate Automation & Garage Control – 6~30VDC Powered
Key Features :-
- Model: ICL-DC-4CH-Relay
- Working Voltage: DC 6-30V
- Product Type: 4-Channel Remote Control Switch
- RF Working Mode: ASK Superheterodyne Reception
- Modulation Mode: ASK
- Three Working Modes: Momentary / Toggle / Latched
- Matching Mode: Intelligent Learning Code
- Quiescent Current: 5mA
- RF Frequency: 433MHz
- Output Current: ≤10A
- Receiving Sensitivity: >104dbm

- Model: ICl-DC-4CH-Relay
- Working Voltage: DC 6-30V
- Product Type: 4-Channel Remote Control Switch
- RF Working Mode: ASK Superheterodyne Reception
- Modulation Mode: ASK
- Working Mode: Momentary/Toggle/Latched, etc.
- Matching Mode: Intelligent Learning Code
- Quiescent Current: 5mA
- RF Frequency: 433MHz
- Output Current: ≤10A
- Receiving Sensitivity: >104dbm
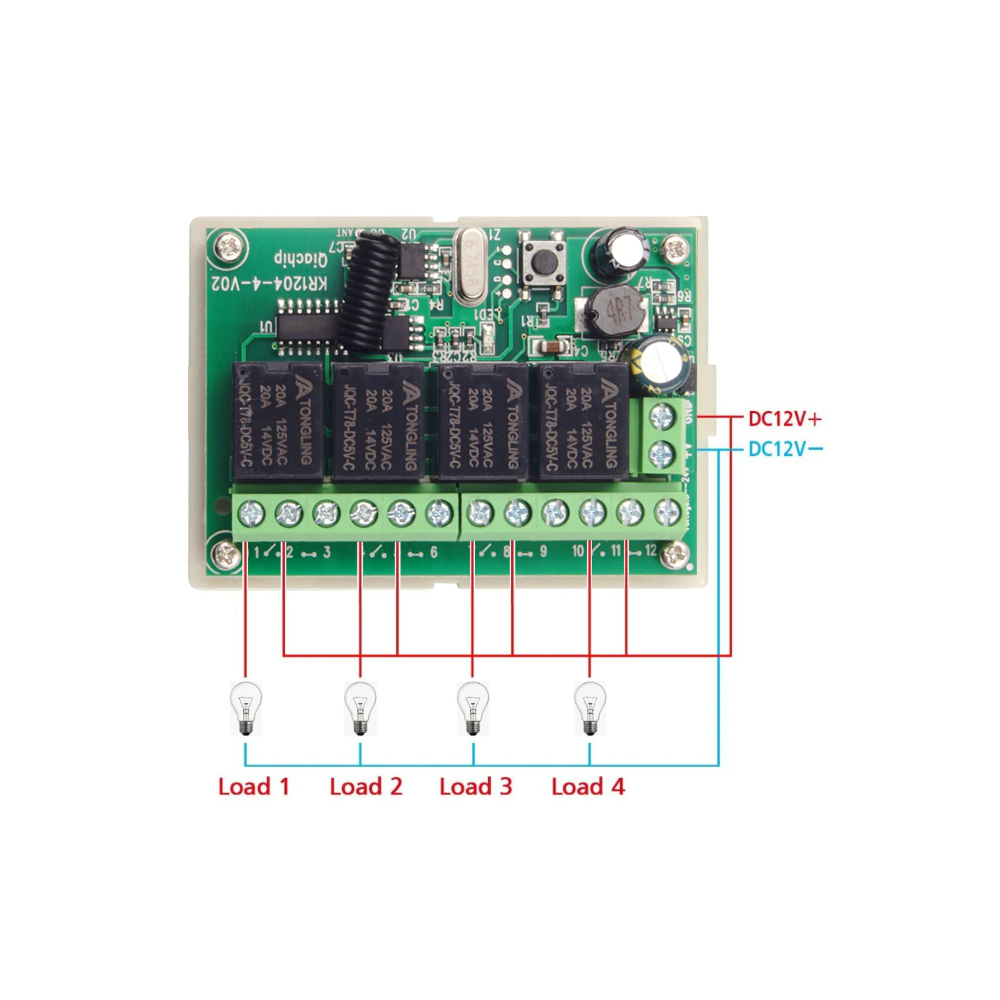
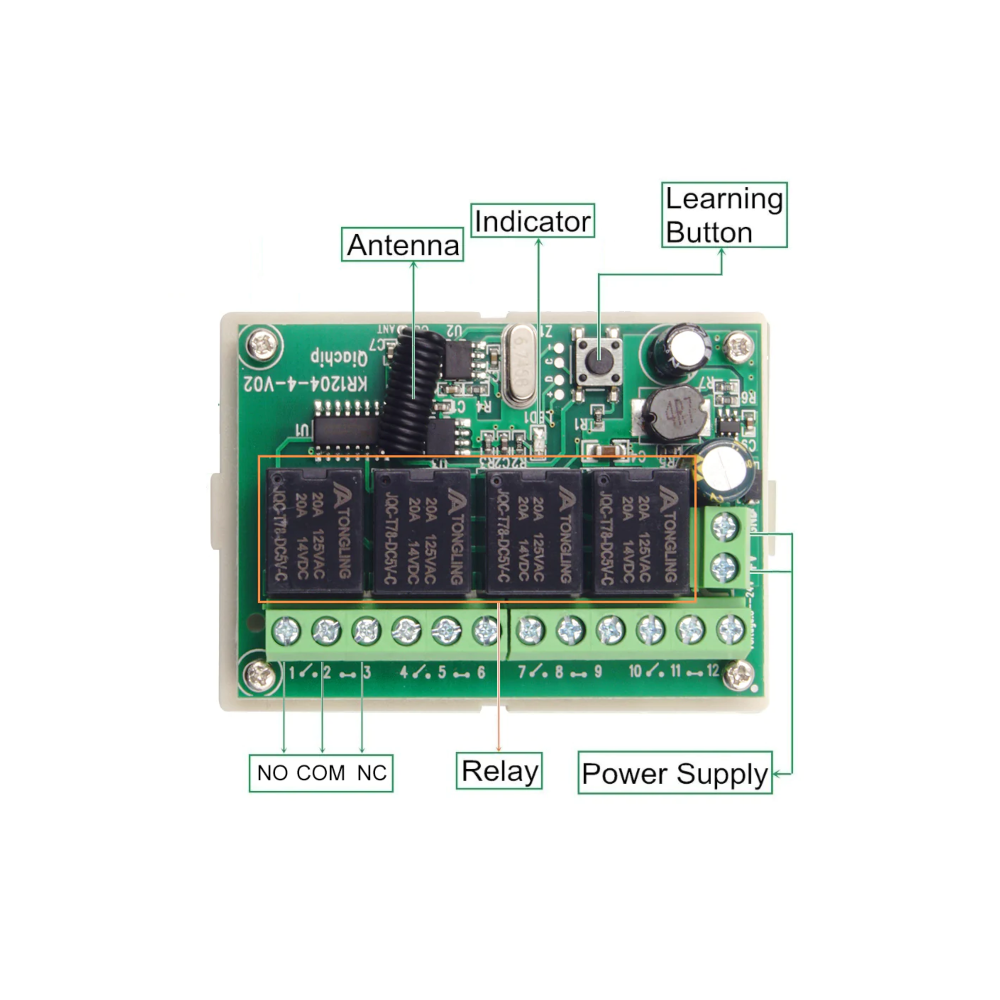
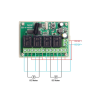
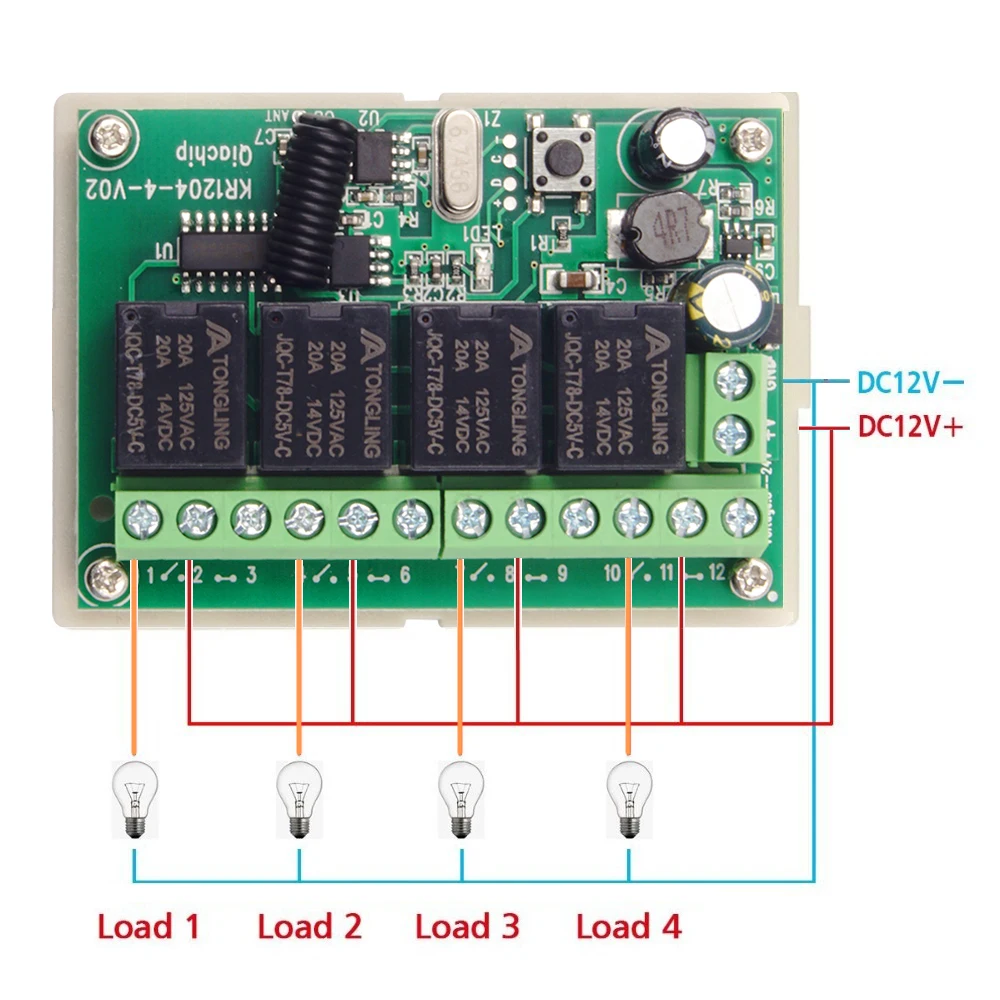
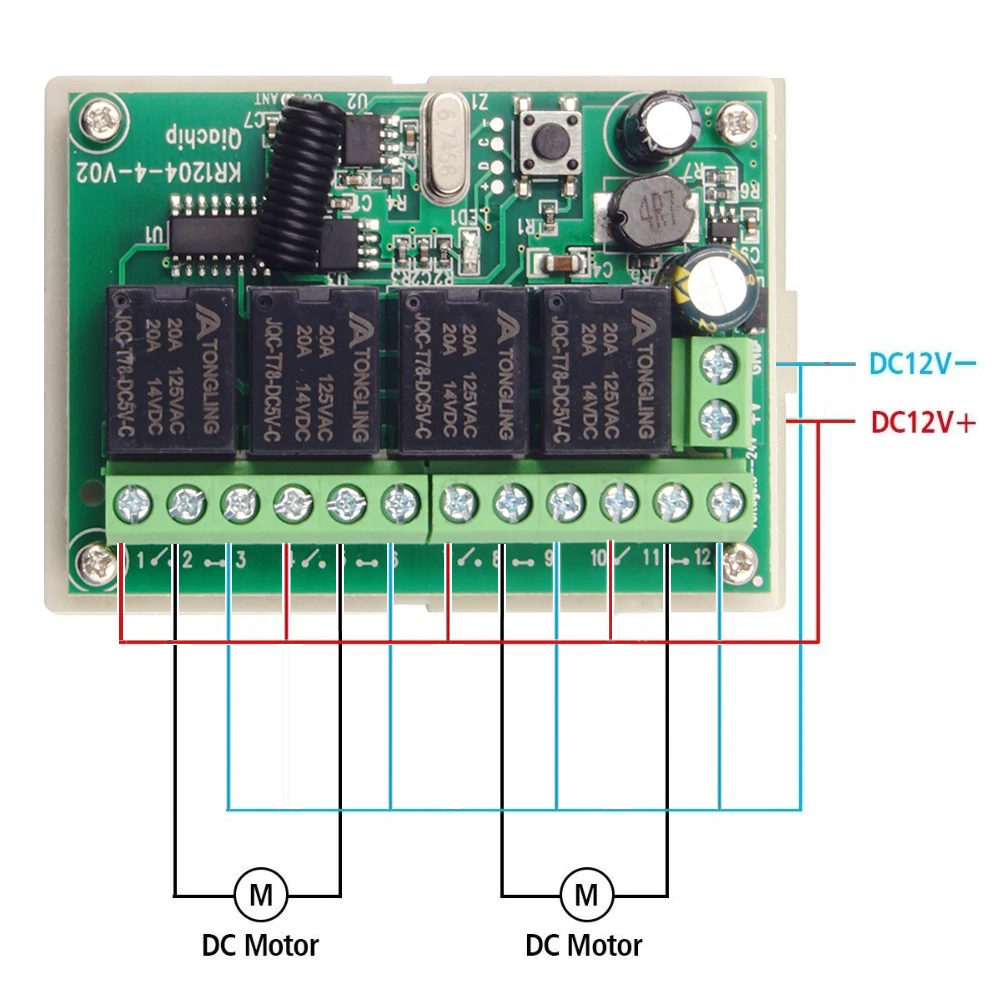
- Wiring instructions:
1, +: Connect to the positive 12V power supply
2. – : Connect to the negative electrode of 12V power supply
3, A: output; normally open end of the relay
4, B: output; relay common;
5, C: output; normally closed relay
Operation Introduction:
1. Momentary / Joggle: Press and hold -> On; Release -> Off
Keep pressing one button, the corresponding channel is working / ON; Release your finger is stop / OFF. (4 channel switch (receiver) need 4 button remote control (transmitter)
2. Toggle / Self-Lock: Press -> On; Press again -> Off
Press one button for one time, the corresponding channel is working / ON; Press the same button again to stop / OFF. (4 channel switch (receiver) need 4 button remote control (transmitter).
3. Latched / Inter-Lock: Press -> on; Press other button -> Off
Press one button for one time, the corresponding channel is working / ON; Press another button is stop / OFF (At the same time, another corresponding channel works). (4 channel switch (receiver) need 4 buttons remote control (transmitter).
The Setting of Working Mode:
1. Momentary Mode: Pressing the learning key button on the receiver board once (LED Indicator on receiver board will flash simultaneously), then press any of the remote button, signaling three times by remote’s LED indicator means setting up the Momentary Mode is successful.
2. Toggle Mode: Pressing two times the learning key button on the receiver board twice (LED Indicator on receiver board will flash simultaneously), then press any of the remote button, signaling three times by remote’s LED means setting up the Toggle Mode is successful.
3. Latched Mode: Pressing the learning key button on the receiver board three times (LED Indicator on receiver board will flash simultaneously), then press first remote button, follow on second remote button, signaling three times by remote’s LED indicator means setting up the Latching Mode is successful (first button stands for on, second button stands for off).
4. 2CH Momentary + 2CH Toggle: Pressing the learning key button on the receiver board four times (LED Indicator on receiver board will flash simultaneously), then press any of the remote button, signaling three times by remote’s LED indicator means setting up this mode is successful.
5. 2CH Momentary + 2CH Latched: Pressing the learning key button on the receiver board five times (LED Indicator on receiver board will flash simultaneously), then press any of the remote button, signaling three times by remote’s LED indicator means setting up this mode is successful.
6. 2CH Toggle + 2CH Latched: Pressing the learning key button on the receiver board six times (LED Indicator on receiver board will flash simultaneously), then press any of the remote button, signaling three times by remote’s LED indicator means setting up this model is successful.
7. 2CH Latching + 2CH Latched: Pressing the learning key button on the receiver board seven times (LED Indicator on receiver board will flash simultaneously), then press any of the remote button, signaling three times by remote’s LED indicator means setting up this model is successful.
8. Deleting Existing Remote Controls Data: Pressing the learning key button on the receiver board eight times, the LED Indicator on receiver board will flash for eight times, it means that the existing remote controls are deleted successfully.